Category: Blog

  • Sowl

    Simple Object Window Library (Sowl)

    Sowl is a C++ object-oriented and light library for Microsoft Windows native graphical applications.

    Objetives

    Design objetives:

    • Be simple: Avoid complex implementation. Avoid complex class hierarchies. Avoid complex resource allocation/release strategies. Avoid multiplatform.
    • Be small: Avoid try to cover all Windows APIs functionality, only the more common cases.
    • Keep original concepts: Use original Windows APIs concepts. Avoid hide them, avoid introduce new ones.
    • Easy resources management: Easy allocate/release Windows resources in the right way, no matters encapsulator objects are created on heap or stack.
    • Easy escape: Ease programmers work directly with Windows APIs when they want.
    • Use patterns: Use well-known software design patters.
    • Avoid macros at all.

    Motivation

    Years ago, when development Microsoft Windows native graphical applications was more common, programmers have to work directly with
    the Windows C APIs. Those APIs are themselves written mostly in C, so C/C++ language was commonly used. But given the C nature of those APIs,
    and their internal design, programmers were strongly limited when coding object oriented programs. The alternative was to use a more
    object-oriented library that acts as a layer over Windows APIs. Popular libraries were (and still are) MFC, OWL, wxWidgets and Qt.

    These libraries suffer somecommons problems when working with them:

    • They introduce a dark and complex layer over the original APIs. This quickly becomes painful when program grows.
    • They introduce new concepts that are internally mapped to original ones. This becomes painful when a programmer wants to use Windows APIs directly.
    • They abuse of macros. Anyone that has dealed with a bug in macro-generated code knows how paintful it is.

    Multiplatform alternatives, like wxWidgets and Qt, add more complexity and additional problems, like the problematic runtime linking mechanism of Qt.

    Even now, with memory managed alternatives (.NET and MPF), working directly with Windows APIs is relevant in many contexts. This library aims to these contexts.

    Hello World

    #include <Sowl/Sowl.h>
    
    int WINAPI wWinMain(_In_ HINSTANCE hInstance, _In_opt_ HINSTANCE, _In_ PWSTR, _In_ int nCmdShow)
    {
        sowl::CustomWindow window(hInstance, L"MyWindowClass");
        window.Show(nCmdShow);
        return sowl::MessageLoop().Run();
    }

    Documentation

    See generated documentation here.

    Visit original content creator repository
    https://github.com/opflucker/Sowl

  • margin-estimator

    margin-estimator

    Calculate estimated margin requirements for equities, options, futures, and futures options. Based on CBOE and CME margining.

    Note

    Not all features are available yet, pending further development.
    Currently, equity/ETF/index options are supported, for any trade
    type other than ratio spreads, box spreads, and jaze lizards.
    Contributions welcome!

    Installation

    $ pip install margin_estimator

    Usage

    Simply pass a list of legs to the calculate_margin function along with an Underlying object containing information on the underlying, and you’ll get back margin requirement estimates for cash and margin accounts!

    from datetime import date
    from decimal import Decimal
    from margin_estimator import (
        ETFType,
        Option,
        OptionType,
        Underlying,
        calculate_margin,
    )
    
    # a SPY iron condor
    # make sure to pass `ETFType.BROAD` for broad-based indices
    underlying = Underlying(price=Decimal("587.88"), etf_type=ETFType.BROAD)
    expiration = date(2024, 12, 20)
    long_put = Option(
        expiration=expiration,
        price=Decimal("4.78"),
        quantity=1,
        strike=Decimal(567),
        type=OptionType.PUT,
    )
    short_put = Option(
        expiration=expiration,
        price=Decimal("5.61"),
        quantity=-1,
        strike=Decimal(572),
        type=OptionType.PUT,
    )
    short_call = Option(
        expiration=expiration,
        price=Decimal("5.23"),
        quantity=-1,
        strike=Decimal(602),
        type=OptionType.CALL,
    )
    long_call = Option(
        expiration=expiration,
        price=Decimal("3.68"),
        quantity=1,
        strike=Decimal(607),
        type=OptionType.CALL,
    )
    margin = calculate_margin(
        [long_put, short_put, long_call, short_call], underlying
    )
    print(margin)
    >>> cash_requirement=Decimal('262.00') margin_requirement=Decimal('262.00')

    For normal equities you can omit the etf_type parameter:

    # a short F put
    underlying = Underlying(price=Decimal("11.03"))
    expiration = date(2024, 12, 20)
    put = Option(
        expiration=expiration,
        price=Decimal("0.45"),
        quantity=-1,
        strike=Decimal(11),
        type=OptionType.PUT,
    )
    margin = calculate_margin([put], underlying)
    print(margin)
    >>> cash_requirement=Decimal('1055.00') margin_requirement=Decimal('263.00')

    And for leveraged products, you’ll need to pass in the leverage_factor:

    # a naked TQQQ call
    underlying = Underlying(
        price=Decimal("77.35"),
        etf_type=ETFType.BROAD,
        leverage_factor=Decimal(3),
    )
    expiration = date(2024, 12, 20)
    call = Option(
        expiration=expiration,
        price=Decimal("4.45"),
        quantity=-1,
        strike=Decimal(80),
        type=OptionType.CALL,
    )
    margin = calculate_margin([call], underlying)
    print(margin)
    >>> cash_requirement=Decimal('7555.00') margin_requirement=Decimal('3661.00')

    Please note that all numbers are baseline estimates based on CBOE/CME guidelines and individual broker margins will likely vary significantly.

    Visit original content creator repository
    https://github.com/tastyware/margin-estimator

  • RandomWordGenerator

    Random Word Generator

    Build License Android Latest Version BCH compliance CodeFactor Known Vulnerabilities Donate using PayPal

    The Random Word Generator Android app generates randomly selected words from large word lists derived from dictionaries and published text corpora.

    The inspirations for this app were Diceware and the xkcd comic Password Strength.

    By using a large dictionary with over 28,000 entries, a randomly selected word will have nearly 14.8 bits of entropy. A phrase made up of 6 words will have over 88.6 bits of entropy, more than enough for a very strong password.

    The random number generator uses the cryptographically secure java.security.SecureRandom class.

    The app is available for download on Google Play.

    Get it on Google Play

    Code of Conduct

    Help us keep RandomWordGenerator open and inclusive. Please read and follow our Code of Conduct.

    Support

    If you would like to contribute towards my project, and allow me to create more open source apps, you can donate using the PayPal button below.

    Donate using PayPal

    License

    Copyright 2017-2018 Stacey Adams
    
    Licensed under the Apache License, Version 2.0 (the "License");
    you may not use this file except in compliance with the License.
    You may obtain a copy of the License at
    
       http://www.apache.org/licenses/LICENSE-2.0
    
    Unless required by applicable law or agreed to in writing, software
    distributed under the License is distributed on an "AS IS" BASIS,
    WITHOUT WARRANTIES OR CONDITIONS OF ANY KIND, either express or implied.
    See the License for the specific language governing permissions and
    limitations under the License.
    

    Google Play and the Google Play logo are trademarks of Google LLC.

    Visit original content creator repository https://github.com/staceybellerose/RandomWordGenerator
  • onClick-Intent-UpwardNavigation

    onClickAttribute-Intent-UpwardNavigation

    onClick

    onClick attribute for any view can be used for setting up a method to be called by system whenever the view is clicked.
    It can be directly accessed from the attribute panel while designing the UI. It has a dropdown from which a compatible method can be selected for onClick property.

    This method must satisfy these conditions.

    1. Public access.
    2. A void or, in Kotlin, an implicit unit return value.
    3. A View as the only parameter. This is the View object you clicked.

    Intent

    An Intent is an object that provides runtime binding between separate components, such as two activities. The Intent represents an app’s intent to do something. In this case, it shows how to start another activity. The startActivity() method starts an instance of the Activity that’s specified by the Intent. Also it shows how to send data from one activity to another using putExtra() method and recieve data at destination activity though getIntent() method or intent.

    Add upward navigation

    Each screen in your app that’s not the main entry point, which are all the screens that aren’t the home screen, must provide navigation that directs the user to the logical parent screen in the app’s hierarchy. To do this, add an Up button in the app bar.

    To add an Up button, you need to declare which activity is the logical parent in the AndroidManifest.xml file.

    Outputs

    ss1.jpg

    ss2.jpg

    Visit original content creator repository
    https://github.com/rishabhkumar812/onClick-Intent-UpwardNavigation

  • PromoGamesFront

    Frontend do projeto 2 – Aluno: Ricardo Ribeiro Rodrigues

    Tema do projeto: Descontos em jogos digitais.

    O FrontEnd desse projeto consiste em 2 telas, uma para mostrar as ofertas, e oferecer a opção de filtrar, ordenar e pesquisar ofertas, e outra para mostrar mais detalhes da oferta, como avaliação na steam e na metacritic (se disponíveis), além de contar com um botão para redirecionar o usuário para o loja que está ofertando o jogo e outro botão para o site da crítica na metacritic.

    Feito com:

    • React
    • Heroku
    • React Router
    • MUI

    Deploy:

    O link para o deploy no heroku está disponível aqui.

    Features principais:

    • Listar jogos em promoção.
    • Ser possível favoritar ofertas.

    Features adicionais:

    • Menu lateral para filtrar por lojas ou por apenas ofertas favoritadas.
    • Opção no menu para ordenar por título, porcentagem de desconto, por preço e pela avaliação na metacritic.
    • Barra de pesquisa para pesquisar ofertas para um jogo específico.
    • Tela adicional para ver detalhes do jogo como avaliação na steam e na metacritic (não são disponibilizadas para todos os jogos), pode ser visto também se houverem, lojas que estão fazendo preços melhores nesse mesmo jogo.
    • Botão para redirecionar para o site ofertando o jogo.

    API:

    O projeto se baseia em uma API de descontos em jogos chamada CheapShark, clique aqui para ver a documentação oficial.

    Visit original content creator repository https://github.com/RicardoRibeiroRodrigues/PromoGamesFront
  • AnalogClockView

    AnalogClockView License

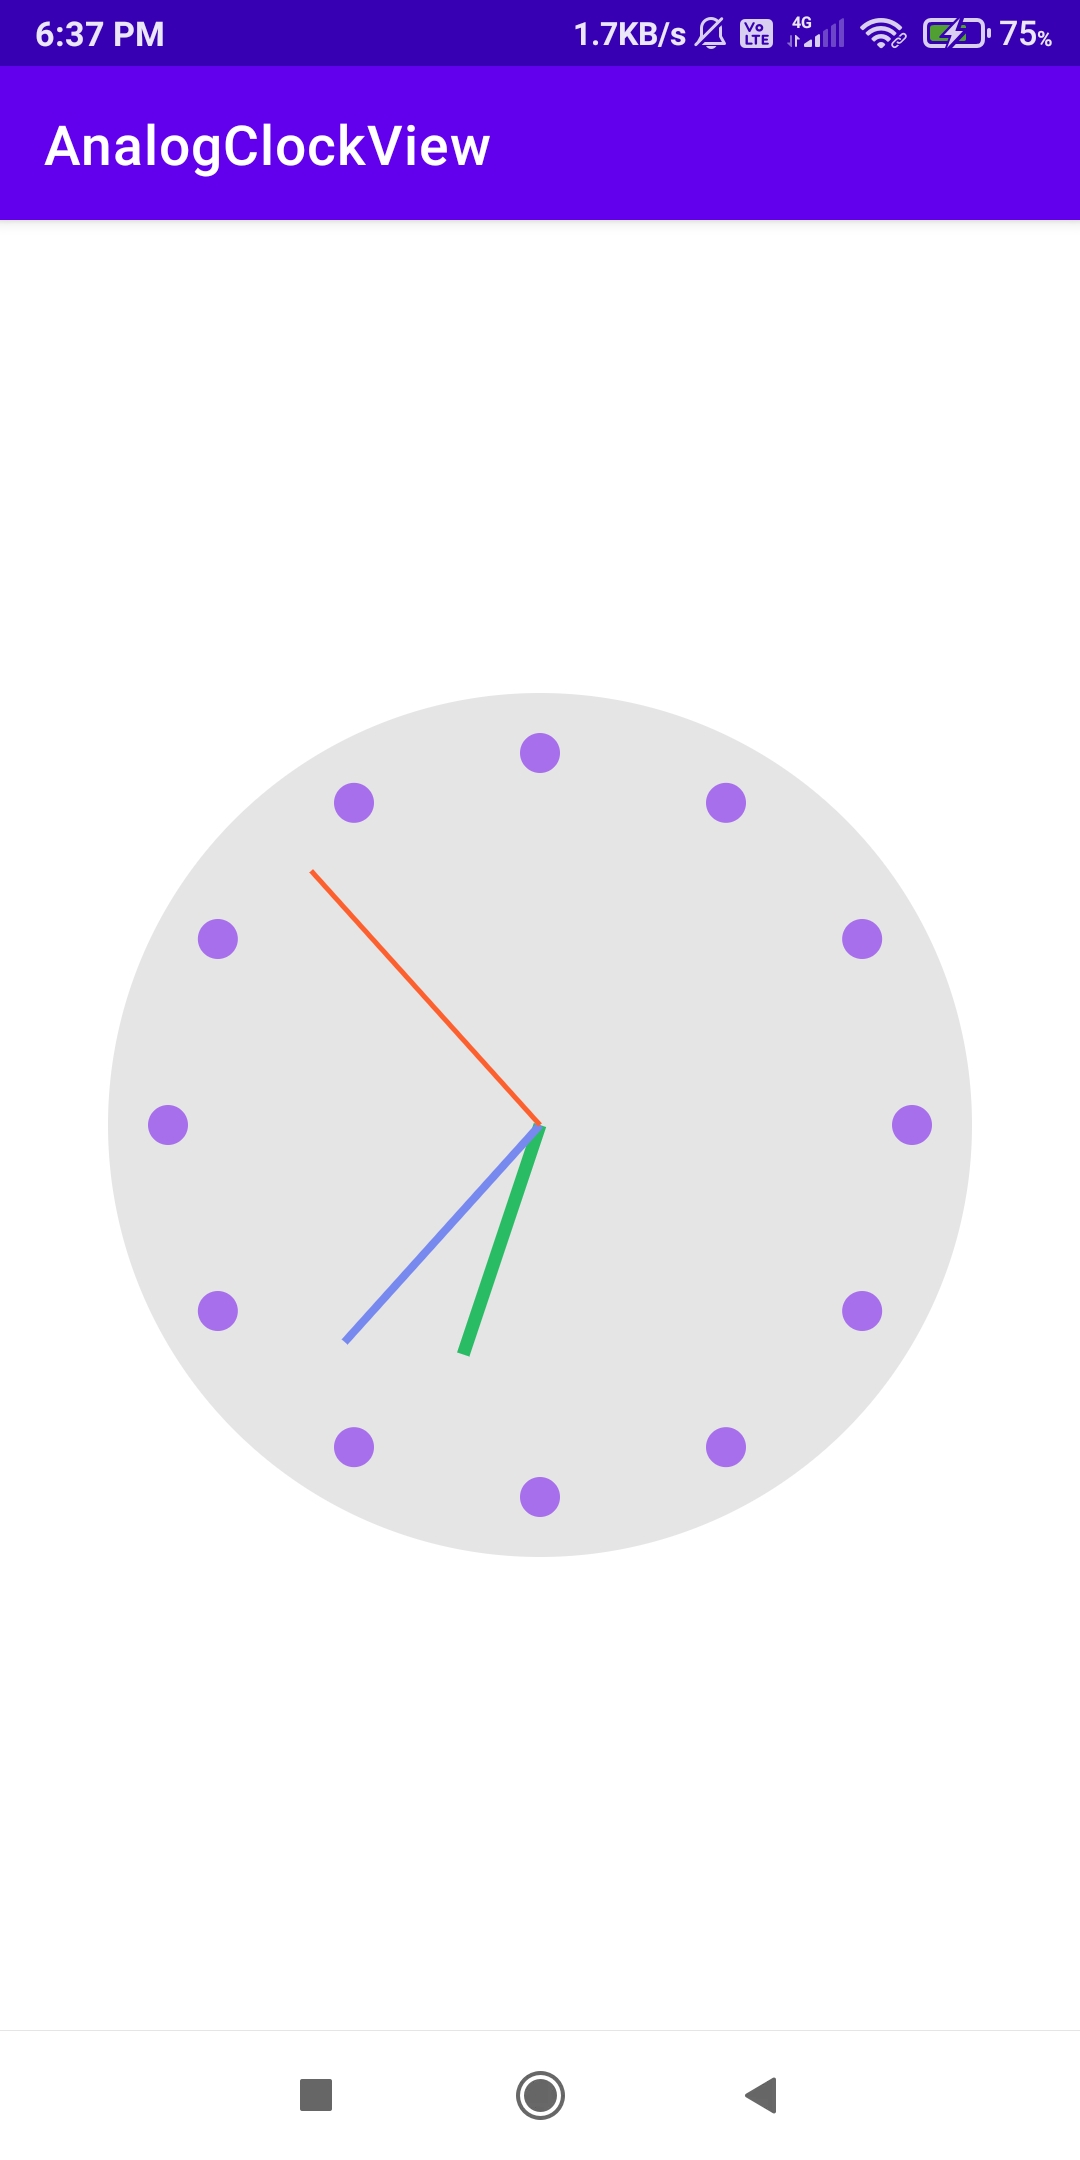
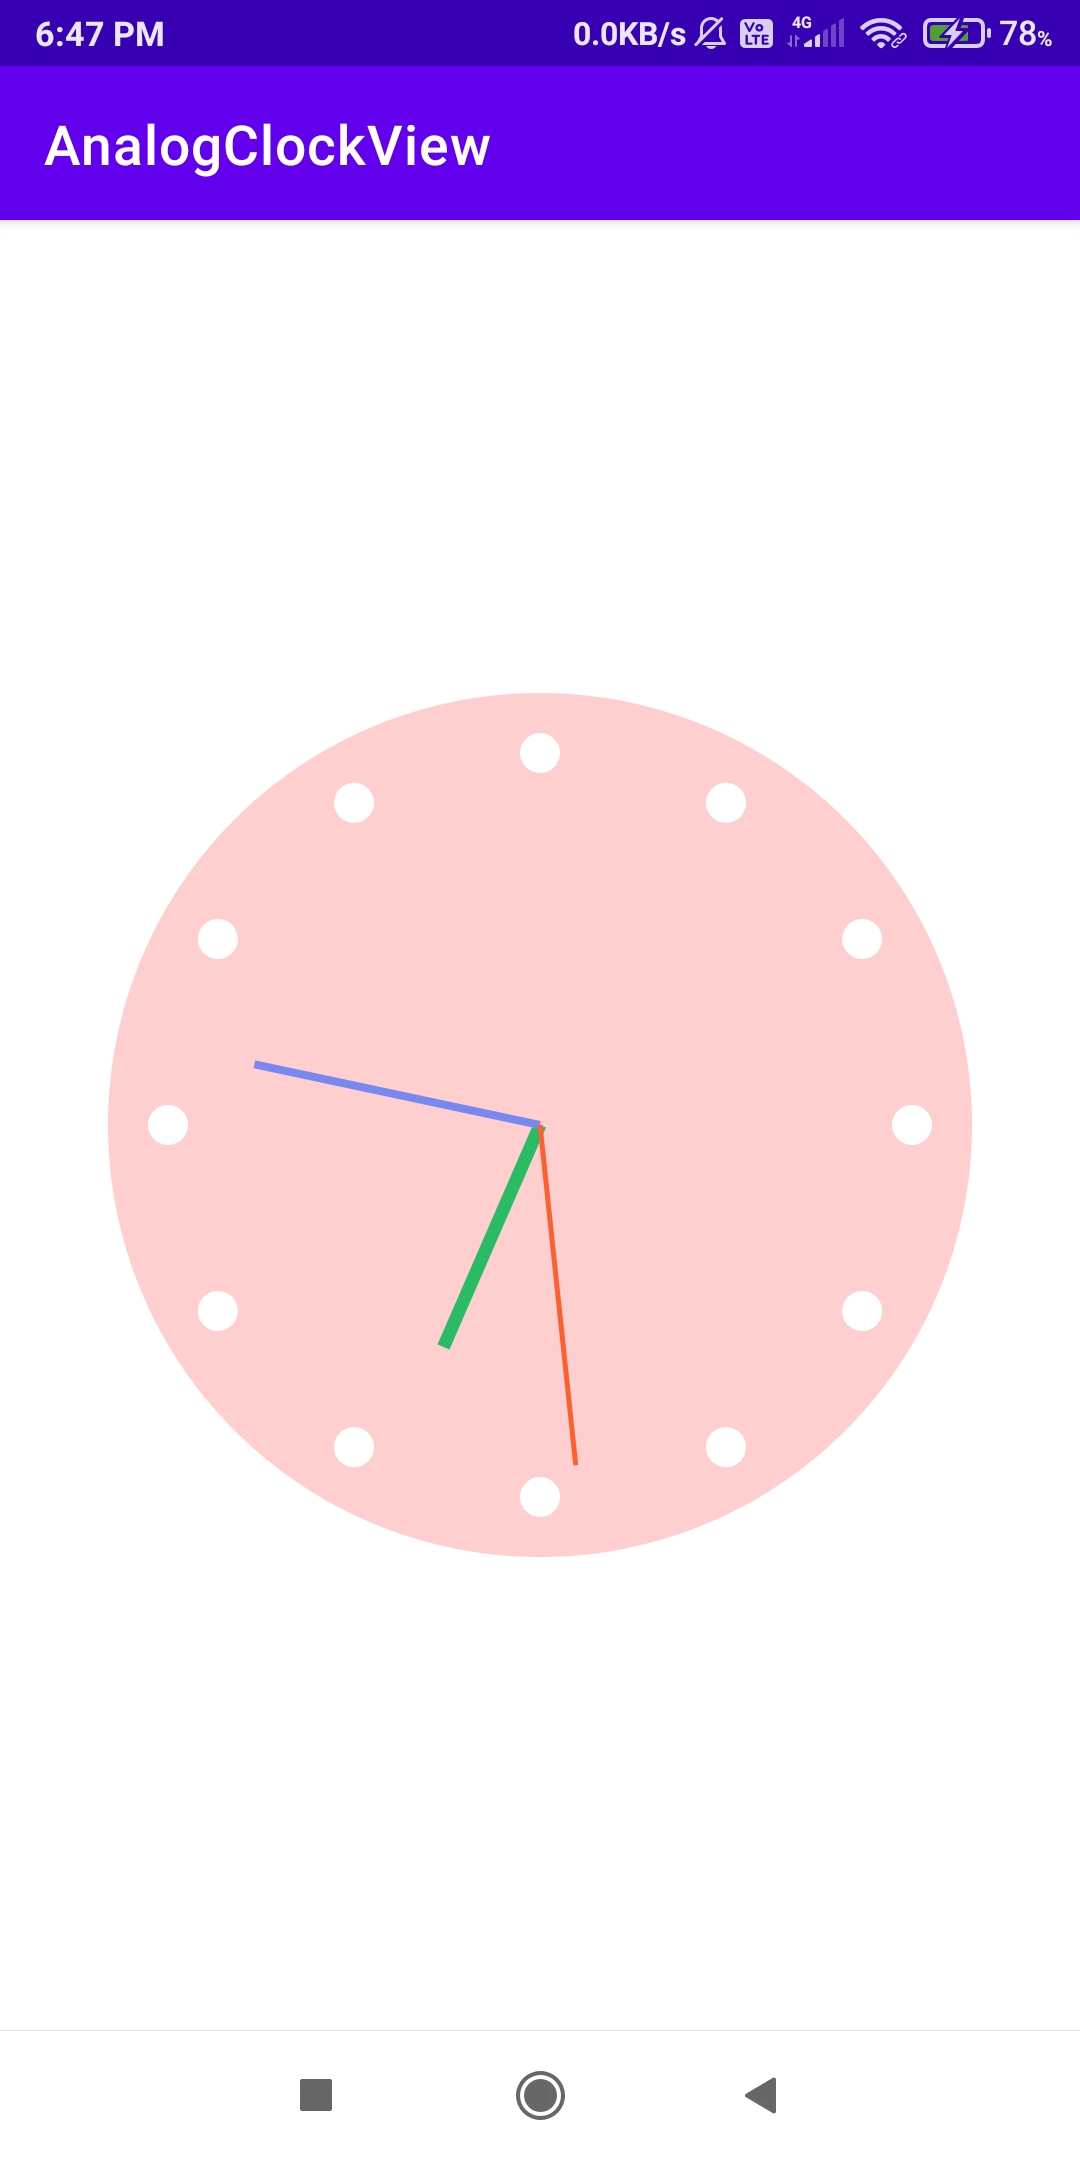
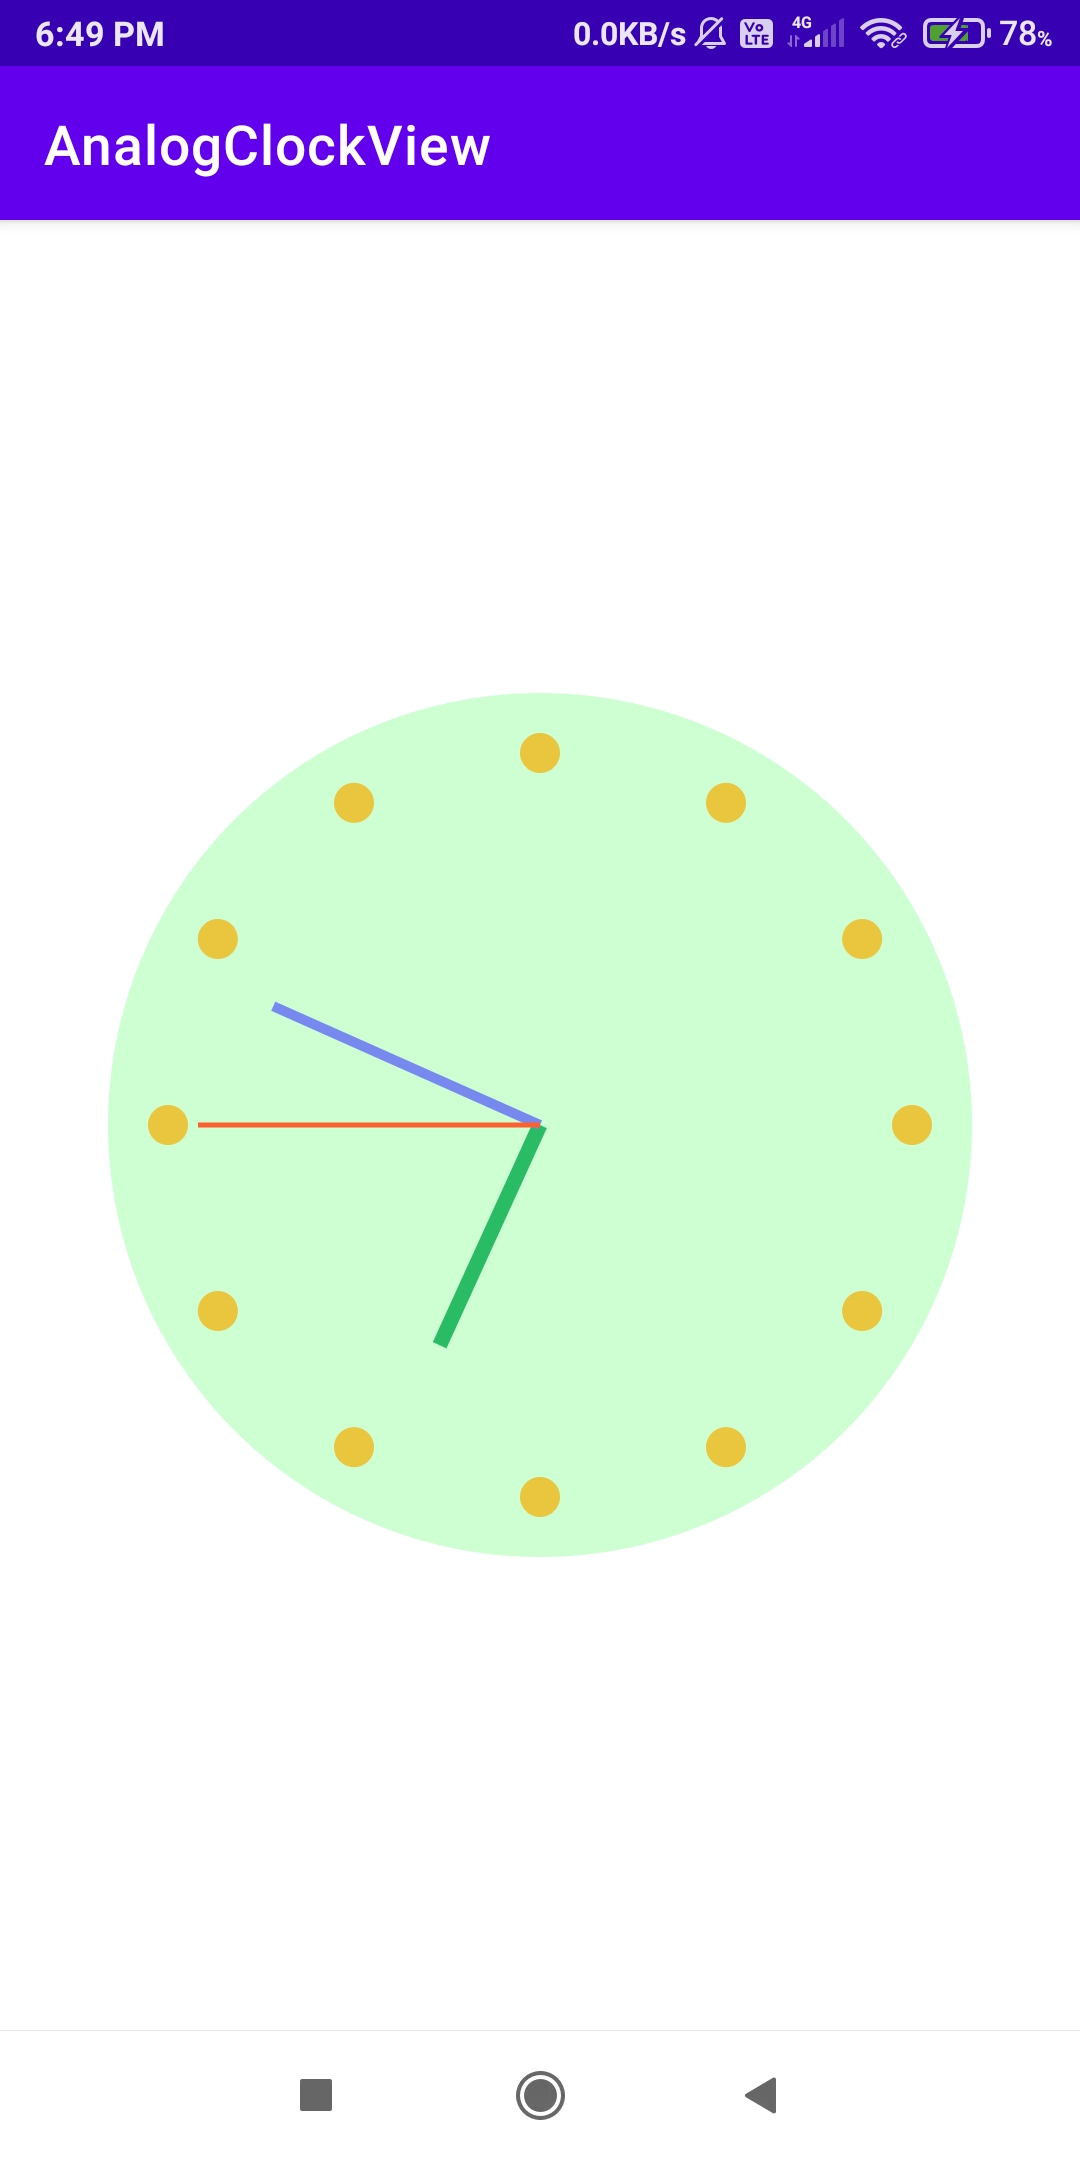
    Output:

    Usage:

    1. Add it in your root build.gradle at the end of repositories:
    	allprojects {
    		repositories {
    			...
    			maven { url 'https://jitpack.io' }
    		}
    	}
    
    1. Add the dependency in app-level build.gradle
    dependencies {
              implementation 'com.github.Hemu43362:AnalogClockView:0.0.1'
      }
    
    1. Layout implementation
      <com.hemantpatel.clock_library.AnalogClockView
          android:id="@+id/clock_view"
          android:layout_width="wrap_content"
          android:layout_height="wrap_content"
          app:pointsColor="#EAC53E"
          app:dialColor="#CDFFD2"
          app:secondHandColor="#FD602F"
          app:minuteHandColor="#7789EF"
          app:hourHandColor="#29BC65"
          app:secondHandWidth="5"
          app:minuteHandWidth="10"
          app:hourHandWidth="15"
          app:layout_constraintBottom_toBottomOf="parent"
          app:layout_constraintLeft_toLeftOf="parent"
          app:layout_constraintRight_toRightOf="parent"
          app:layout_constraintTop_toTopOf="parent" />
    1. Don’t forget to call startClock() in OnStart() and stopClock() in OnStop()
       // get reference of AnalogClockview
       private val mClockView: AnalogClockView
            get() = findViewById(R.id.clock_view)
       override fun onStart() {
            super.onStart()
            mClockView.startClock()
        }
       override fun onStop() {
            super.onStop()
            mClockView.stopClock()
        }

    Attribute details:

    Atrribute Properties Type Default Value̥
    pointsColor color of points which indicates the numbers Color Color.WHITE
    dialColor color of dial of watch Color Color.GRAY
    secondHandColor color of second hand Color Color.RED
    minuteHandColor color of minute hand Color Color.YELLOW
    hourHandColor color of hour hand Color Color.GREEN
    secondHandWidth width of second hand Float 8f
    minuteHandWidth width of minute hand Float 12f
    hourHandWidth width of hour hand Float 15f

    Changelog:

    0.0.1

    • Initial release
    • added attributes for customize clock hand, dial and points

    License:

    Copyright 2021 HemantPatel
    Licensed under the Apache License, Version 2.0 (the "License");
    you may not use this file except in compliance with the License.
    You may obtain a copy of the License at
       http://www.apache.org/licenses/LICENSE-2.0
    Unless required by applicable law or agreed to in writing, software
    distributed under the License is distributed on an "AS IS" BASIS,
    WITHOUT WARRANTIES OR CONDITIONS OF ANY KIND, either express or implied.
    See the License for the specific language governing permissions and
    limitations under the License.
    
    Visit original content creator repository https://github.com/Patel-Hemant/AnalogClockView
  • minimalist

    Minimalist

    Build Status License

    Minimalist is a simple and light weighted jekyll theme. It focuses on a minimalistic design but still providing all functionality for a personal blog.

    Installation

    To install Open Recipes you have to install jekyll. After successfully installing jekyll you have to clone this repository to your computer:

    git clone https://github.com/Trybnetic/minimalist.git
    

    Then switch into the directory and start jekyll:

    cd minimalist
    bundle exec jekyll serve
    

    The last command starts a webserver on your local machine. Now you should have a copy of the site running at http://127.0.0.1:4000/. Open this url with your webbrowser and explore the site.
    By changing some of the files (except of the config.yml) the changes will be displayed immediately.

    Usage

    After you successfully installed the theme on your computer you can add additional blog posts by creating new files in the _posts directory. The new files have to follow the name convention year-month-day-title.md.

    Post structure

    Example:

    {
      "total_bases": 21750112406,
      "total_sequences": 1305936,
      "mean_length": 16654.807284583625,
      "median_length": 16600.0,
      "n10": 18849,
      "n25": 17833,
      "n50": 16739,
      "n75": 15842,
      "n90": 15209
    }
    
    1. total_bases – the total number of basepairs across all sequences in the input file
    2. total_sequences – the total number of sequences (i.e. strings) contained in the input file
    3. mean_length – the average length of the counted sequences
    4. median_length – the median length of the counted sequences
    5. n10, n25, n50, n75, n90 – the N-score of the sequences for 10, 25, 50, 75, and 90 respectively; these should be monotonically decreasing, respectively

    Options to consider

    1. -h – see full list of options and exit
    2. -l, --length-json – enables the saving of the raw length counts to a specified JSON file
    3. -o, --out-json – enabled used to specify the filename to write the length statistics to (default: stdout)

    TODO List

    1. Create an option for other N-score values (or maybe all integer N-score values)
    2. If you have other length-based statistics, feel free to open a feature request on GitHub.

    Performance notes

    We have not performed formal benchmarking. Anecdotally, the vast majority of the run-time is spent loading the FASTX file, so the program is very I/O bound currently.

    Reference

    Fastleng does not currently have a pre-print or paper associated with it.

    License

    Licensed under either of

    at your option.

    Contribution

    Unless you explicitly state otherwise, any contribution intentionally submitted for inclusion in the work by you, as defined in the Apache-2.0 license, shall be dual licensed as above, without any additional terms or conditions.

    Visit original content creator repository https://github.com/HudsonAlpha/rust-fastleng
  • keraspp

    KERASPP

    코딩셰프의 3분 딥러닝, 케라스맛

    Keras 코드로 맛보는 ANN, DNN, CNN, RNN, AE, GAN, UNET

    케라스 코드로 맛보는 딥러닝 핵심 개념!

    간결하고 직관적인 인공신경망 API를 제공하는 케라스는 구글 텐서플로, 마이크로소프트 CNTK, 아마존 MXNET, OpenCL PlaidML, 시애노 등의 딥러닝 엔진에서 지원하는 인기 인공지능 툴입니다. 이 코드들은 딥러닝 인공신경망 구현에 케라스를 사용합니다. 케라스로 주요 인공신경망인 ANN, DNN, CNN, RNN, AE, GAN, UNET을 구현하는 방법을 알아봅니다. 따라서 인공지능과 딥러닝 인공신경망의 구현에 관심이 있는 누구나 이 코드의 사용자입니다.

    3분 딥러닝 케라스맛

    구성

    케라스를 이용해 딥러닝 인공신경망을 만들어 인공지능을 구현합니다. 1장은 케라스를 시작하는 데 필요한 기초를 다룹니다. 2장부터는 최신 인공지능 구현 방법인 주요 인공신경망을 예제로 이용해 다룹니다. 2장~5장에서 다루는 ANN, DNN, CNN, RNN은 지도학습 방식의 인공지능입니다. 6장과 7장에서 다루는 AE와 GAN은 비지도학습 방식이고 8장의 UNET은 고급 지도학습 방법입니다. 9장은 8장까지 배운 내용을 응용하고 확장하는 방법을 다룹니다.

    예제는 쉽게 인공지능 구현 방법을 익히고, 추후 실무에 쉽게 재사용할 수 있게 하는 데 주안점을 두어 작성했습니다.

    0장. 프롤로그

    인공지능과 딥러닝 인공신경망의 개요를 알아봅니다. 그리고 인공신경망을 구현하는 케라스를 간단히 소개합니다.

    1장. 케라스 시작하기

    케라스는 인공지능을 파이썬으로 구현하는 라이브러리입니다. 케라스를 설치하는 방법과 간단한 인공신경망을 구현하는 예제를 다룹니다.

    2장. 케라스로 구현하는 ANN(인공신경망)

    ANN(artificial neural network)은 두뇌의 신경망을 흉내 낸 인공지능 기술입니다. ANN은 입력 계층, 은닉 계층, 출력 계층으로 구성되어 있습니다. 초기에는 기술적인 한계로 은닉 계층을 한 개만 포함하여 주로 총 3개 계층으로 ANN을 구성했습니다. 이 장에서는 ANN 구성에 필요한 요소를 이해하고 예제를 살펴보며 ANN 구현 방법을 익힙니다.

    3장. 케라스로 구현하는 DNN(심층신경망)

    DNN(deep neural network)은 은닉 계층을 여러 개 쌓아서 만든 인공신경망입니다. 다수의 은닉 계층을 이용하는 DNN은 ANN에 비해 더 우수한 성능을 내며 적용 분야도 다양합니다. 이 장에서는 DNN의 구성에 필요한 요소를 이해하고 케라스로 구현하는 방법을 익힙니다.

    4장. 케라스로 구현하는 CNN(합성곱신경망)

    CNN(convolutional neural network)은 영상 처리에 많이 활용되는 합성곱(convolution)을 이용하는 신경망 기술입니다. 합성곱에 사용되는 필터들은 학습을 통해 이미지 내의 특징점들을 자동으로 추출해냅니다. CNN은 이런 과정을 통해 기존에 수작업으로 찾던 특징점을 스스로 찾게 됩니다. 이 장에서는 CNN의 원리를 이해하고 케라스로 구현하는 방법을 알아봅니다.

    5장. 케라스로 구현하는 RNN(순환신경망)

    RNN(recurrent neural network)은 계층의 출력이 순환하는 인공신경망입니다. 재귀를 이용해 자기 계층의 출력 정보를 입력 신호로 다시 사용해 신경망의 성능을 높입니다. 특히 문자열, 음성 등 시계열 정보의 예측에 많이 활용됩니다. 이 장에서는 RNN의 기본 개념을 이해하고 예제를 구현해봅니다.

    6장. 케라스로 구현하는 AE(오토인코더)

    AE(autoencoder)는 비지도학습 인공신경망입니다. 비지도학습은 레이블 정보가 없는 데이터의 특성을 분석하거나 추출하는 데 사용됩니다. 비지도학습의 대표적인 방식인 AE의 목적은 입력 데이터의 특징점을 효율적으로 찾는 겁니다. 이 장에서는 AE의 원리를 이해하고 케라스로 구현하는 방법을 익힙니다.

    7장. 케라스로 구현하는 GAN(생성적 적대 신경망)

    GAN(generative adversarial network)은 경쟁을 통한 최적화를 수행하는 생성적 인공신경망입니다. GAN 내부의 두 인공신경망이 상호 경쟁하면서 학습을 진행합니다. 두 신경망 중의 하나는 생성망이고 다른 하나는 판별망입니다. 이 장에서는 GAN의 개념을 소개하고 케라스로 구현하는 방법을 다룹니다.

    8장. 케라스로 구현하는 UNET(유넷)

    UNET(U-shaped network)은 저차원과 고차원 정보를 모두 사용하여 이미지의 경계를 비롯한 특징을 추출하는 인공신경망입니다. 차원 정보만 이용해 고차원으로 복원해나가는 AE와 달리 고차원 특징점도 함께 이용해 디코딩을 진행해 이미지의 특징 추출에 용이합니다. 이 장에서는 UNET의 개념을 이해하고 구현 방법을 익힙니다.

    9장. 케라스 응용

    케라스를 이용하여 실제 문제에 인공지능을 활용할 때 생기는 문제를 효율적으로 처리하는 고급 기능을 다룹니다. 종종 학습에 필요한 데이터가 충분하지 못한 경우가 있습니다. 이런 경우는 학습 데이터 수를 늘려주거나 기존에 학습된 인공신경망을 재활용해야 합니다. 이 장에서는 인공지능 기술의 실전 활용을 위해 필요한 이미지 늘리기와 기존 망 재사용하기 방법을 익힙니다.

    참고 자료

    케라스 시작하기

    [1] 추형석, 「인공지능의 역사와 성공요인」, 월간SW중심사회, 2016.12., https://spri.kr/posts/view/21643?code=inderstry_trend (2017. 12. 4)

    [2] NVIDIA KOREA, 「인공지능(AI)은 어떻게 발달해왔는가」, 인공지능의 역사, 2016. 3. 13, http://blogs.nvidia.co.kr/2016/03/13/history_of_ai/ (2017. 12. 4)

    [3] 「NVIDIA KOREA, 인공지능과 머쉰러닝, 딥러닝의 차이점을 알아보자, 2016. 8. 3, http://blogs.nvidia.co.kr/2016/08/03/difference_ai_learning_machinelearning/ (2017. 12. 4)

    [4] 삼성전자, “[핫테크 3분 클래스] 딥러닝 편”, YouTube, 2016. 10. 16, https://www.youtube.com/watch?v=3jCaGDIY6VM (2017. 12. 4)

    [5] Vertex.ai, “PlaidML 소개: 모든 플랫폼을 위한 오픈소스 딥러닝 (Announcing PlaidML: Open Source Deep Learning for Every Platform)”, 2017. 10. 20, http://vertex.ai/blog/announcing-plaidml (2017. 12. 4)

    [6] ‘인텔의 신무기’ 너바나 창업자 “AI 시대 CPU·GPU·메모리는 결국 통합된다”, 조선비즈, 2017. 5. 16, http://biz.chosun.com/site/data/html_dir/2017/05/16/2017051602248.html

    [7] “애플, AI 칩 ‘뉴런 엔진’ 개발…생태계 확장”, ZDNET Korea, 2017. 5. 28, http://www.zdnet.co.kr/news/news_view.asp?artice_id=20170528102955

    [8] Keras Documentation, “Keras: The Python Deep Learning library “, https://keras.io/ (2017. 12. 4)

    [9] DWFOX, “Python Windows 개발 환경 구성 – anaconda python 설치”, http://dwfox.tistory.com/67 (2017. 12. 12)

    [10] Jaeseung Lee, Jupyter Notebook 설치/사용방법, 2016. 5. 25, https://m.blog.naver.com/PostView.nhn?blogId=jaeseung172&logNo=220719131067&proxyReferer=https%3A%2F%2Fwww.google.com%2F (2017. 12. 12)

    케라스로 구현하는 ANN

    [1] Schmidhuber, J. (2015). “Deep Learning in Neural Networks: An Overview”. Neural Networks. 61: 85–117. arXiv:1404.7828 . doi:10.1016/j.neunet.2014.09.003. PMID 25462637.

    [2] 데이터 사이언스 스쿨, “신경망 성능개선”, https://datascienceschool.net/view-notebook/f18248a467e94c6483783afc93d08af9/ (2017. 12. 2)

    케라스로 구현하는 DNN

    [1] LeCun, Yann; Bengio, Yoshua; Hinton, Geoffrey (2015). “Deep learning”. Nature. 521 (7553): 436–444. Bibcode:2015Natur.521..436L. doi:10.1038/nature14539. PMID 26017442.

    [2] Wizard’s Note, “딥러닝 단어사전”, http://wizardsnote.tumblr.com/post/138818343004/딥러닝-단어사전-뉴럴넷-구조-1 (2017. 12. 2)

    케라스로 구현하는 CNN

    [1] LeCun, Yann. “LeNet-5, convolutional neural networks”. Retrieved 16 November 2013.

    [2] Github.io, “CS231n: Convolutional Neural Networks for Visual Recognition”, http://cs231n.github.io (2017. 12. 2)

    케라스로 구현하는 RNN

    [1] Deeplearning4j (DL4J), 초보자를 위한 RNNs과 LSTM 가이드, https://deeplearning4j.org/kr/lstm

    [2] 김병희, 순환신경망(Recurrent neural networks) 개요, slideshare.net, 2017. 3. 22, https://www.slideshare.net/ByoungHeeKim1/recurrent-neural-networks-73629152

    케라스로 구현하는 AE

    [1] The Keras Blog, Building Autoencoders in Keras, 2016. 5. 14, https://blog.keras.io/building-autoencoders-in-keras.html (2017. 12. 4)

    [2] 정병기, Image denoising with Autoencoder in Keras, 2017. 3. 3, https://byeongkijeong.github.io/Keras-Autoencoder/ (2017. 12 4)

    [3] 조대협, 오토인코더를 이용한 비정상 거래 검출 모델의 구현 #1 – 신용카드 거래 데이터 분석, 2017. 9. 11, http://bcho.tistory.com/1197 (2017. 12. 4)

    케라스로 구현하는 GAN

    [1] Ian Goodfellow, “Generative Adversarial Networks”, 2014, https://arxiv.org/abs/1406.2661

    [2] Ian Goodfellow, “Generative Adversarial Networks” at NIPS Workshop on Perturbation, Optimization, and Statistics, Montreal, 2014. (presentation)

    [3] 깃허브, “PyTorch로 구현한 GAN”, https://github.com/devnag/pytorch-generative-adversarial-networks/blob/master/gan_pytorch.py (2017. 12. 4)

    [4] Dev Nag, “Generative Adversarial Networks (GANs) in 50 lines of code (PyTorch)”, https://medium.com/@devnag/generative-adversarial-networks-gans-in-50-lines-of-code-pytorch-e81b79659e3f (2017. 12. 4)

    [5] 유재준, “초짜 대학원생 입장에서 이해하는 Generative Adversarial Nets”, http://jaejunyoo.blogspot.com/2017/01/generative-adversarial-nets-1.html (2017. 12. 4)

    [6] 링링 (ling1134), 생태학 – 상사(Analogous)와 상동(Homologous), 공진화(Coevolution)와 공생(Coexistence), 2013. 3. 18, http://blog.naver.com/PostView.nhn?blogId=ling1134&logNo=70162877431&parentCategoryNo=&categoryNo=34&viewDate=&isShowPopularPosts=false&from=postView (2017. 12. 4)

    [7] 김범수, “Batch Normalization 설명 및 구현”, 2016. 1. 13, https://shuuki4.wordpress.com/2016/01/13/batch-normalization-설명-및-구현/ (2017. 12. 4)

    [8] 임종대(번역), ‘기계 학습(Machine Learning, 머신 러닝)은 즐겁다! Part 7’, https://medium.com/@jongdae.lim/기계-학습-machine-learning-은-즐겁다-part-7-2435b4a55ccd (2017. 12. 2)

    케라스로 구현하는 UNET

    [1] Ronneberger, O., Fischer, P. & Brox, T., “U-net: Convolutional networks for biomedical image segmentation.” in International Conference on Medical Image Computing and Computer-Assisted Intervention 234–241 (Springer, 2015).

    케라스 응용

    [1] Arthur Juliani, “ResNets, HighwayNets, and DenseNets, Oh My!”, 2016. 10. 14, https://chatbotslife.com/resnets-highwaynets-and-densenets-oh-my-9bb15918ee32 (2017. 12. 2)

    [2] Github.io, “Transfer learning” in CS231n: Convolutional Neural Networks for Visual Recognition, http://cs231n.github.io/transfer-learning/ (2017. 12. 2)

    [3] Greg Chu, “How to use transfer learning and fine-tuning in Keras and Tensorflow to build an image recognition system and classify (almost) any object”, https://deeplearningsandbox.com/how-to-use-transfer-learning-and-fine-tuning-in-keras-and-tensorflow-to-build-an-image-recognition-94b0b02444f2 (2017. 12. 2)

    [4] Felix Yu, “A Comprehensive guide to Fine-tuning Deep Learning Models in Keras (Part I)”, 2016. 10. 8, https://flyyufelix.github.io/2016/10/03/fine-tuning-in-keras-part1.html (2017. 12. 2)

    [5] Adrian Rosebrock, “ImageNet: VGGNet, ResNet, Inception, and Xception with Keras”, 2017. 3. 20, https://www.pyimagesearch.com/2017/03/20/imagenet-vggnet-resnet-inception-xception-keras/ (2012. 12. 2)

    Visit original content creator repository https://github.com/jskDr/keraspp